
Christmas🎄 Sweets Recipes
- Created:
1. 12. 2020 - Updated:
7. 10. 2022 -


![]()
![]()
![]()
![]()
The most beautiful thing about Christmas is the expectation. The time we spend with family, sitting around the advent wreath, singing carols and reading stories about Christmas while kids dream about Santa. The quiet hours which we spend together are rare moments. We spend them during everyday activities. But it’s not about how much free time we can reserve, but rather how we use it together.

Every member of the family has a different idea about the arrival of Christmas looks like, it can be a little more difficult to find a program that suits everyone. But the different approaches are perfectly fine, just ask yourself which tradition you want to preserve and where to compromise.
And what’s the most traditional and what’s tune the Christmas mood more than a smell of Christmas sweets!
Christmas Gingerbread

Ingredients
- 150g unsalted butter, cubed
- 1/2 cup (125ml) golden syrup
- 1/2 cup (110g) firmly packed brown sugar
- 1 teaspoon bicarbonate of soda
- 3 cups (450g) plain flour
- 1 tablespoon ground ginger
- 1 teaspoon ground cinnamon
- 1/2 teaspoon nutmeg
- 1/2 teaspoon ground cloves
- 1/2 teaspoon baking powder
- 1 egg, lightly whisked
- Writing fudge, to decorate
- Rainbow choc chips, to decorate
Method
- Preheat oven to 180°C. Line 2 large oven trays with baking paper.
- Place butter, golden syrup and sugar in a medium saucepan over medium heat. Cook, stirring, for 3 minutes or until sugar dissolves. Bring to the boil. Remove from heat. Add bicarbonate of soda and stir to combine. Transfer to a large heatproof bowl. Set aside to cool.
- Sift flour, ginger, cinnamon, nutmeg, cloves and baking powder over butter mixture. Add the egg and stir until combined. Turn onto a lightly floured surface and gently knead until smooth. Divide dough into two portions. Shape each portion into a disc and cover with plastic wrap. Place in the fridge for 45 minutes or until firm.
- Roll one portion between 2 sheets of baking paper until 5mm thick. Using a 6-7cm Christmas pastry cutters, cut shapes from dough, re-rolling scraps. Place on the lined trays, 3cm apart to allow for spreading. Repeat with remaining gingerbread portion.
- Bake in preheated oven, 1 tray at a time, for 8 minutes or until just firm to touch. Remove from oven and set aside on trays for 5 minutes to cool before transferring to a wire rack to cool completely. Decorate gingerbread using writing fudge and rainbow choc chips, if desired.
Source: Taste.com
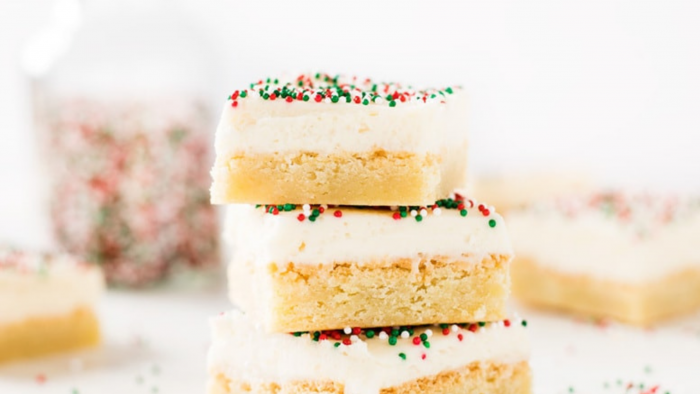
Christmas Sugar Cookie Bars
This sugar cookie bar recipe is literally half sugar cookie and half frosting. They are decadent and delicious. And, obviously use some Christmas-colored sprinkles.
Ingredients
For the sugar cookie bars:
- 1 stick (1/2 cup) salted butter softened to room temp.
- 1 cup sugar
- 1 egg
- 1 tsp vanilla
- 2 cups all-purpose flour
- 1 tsp baking powder
- 1/4 cup festive sprinkles
For the frosting:
- 2 cups powdered sugar
- 1 stick (1/2 cup) salted butter softened to room temp.
- 3 tbsp cream cheese softened
- 1 tsp vanilla
- 2 tbsp milk
- additional sprinkles
Method
-
Preheat oven to 350f degrees. Line a 9×9″ baking pan with parchment paper.
-
Beat together butter and sugar until fluffy, then beat in egg and vanilla. Finally, beat in flour and baking powder, a little at a time, until you have a thick batter. Gently stir in the sprinkles.
-
Spread batter into it prepared baking pan.
-
Bake at 350f degrees for 20 minutes or until golden brown. Once it’s finished baking, take cookie bar out of the oven and allow to cool fully. Once it is cooled, carefully lift the sides of the parchment paper to pull the whole cookie bar out of the baking pan.
-
To make the frosting, blend together powdered sugar, butter, cream cheese, vanilla and milk with an electric mixer. Spread frosting generously on cookie bar, and top with additional sprinkles.
-
Cut into squares and serve immediately or let frosting set for a firmer feel.
Source: The Country Cook
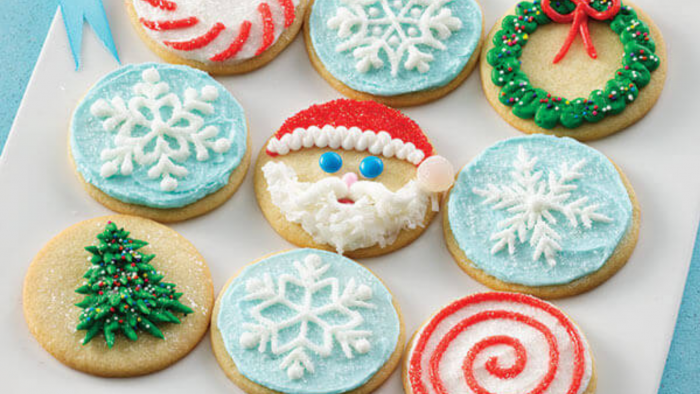
Christmas Circle Cookies
Ingredients
Cookie
- 1 cup butter, softened
- 1 cup sugar
- 1 large egg
- 2 tablespoons milk
- 1 12 teaspoons almond extract
- 2 12 cups all-purpose flour
- 1 teaspoon baking powder
Frosting
- 6 cups powdered sugar
- 23 cup butter, softened
- 1 tablespoon vanilla
- 4 to 6 tablespoons heavy whipping cream
Decorations
- Red, green and/or blue food color
- Mini candy-coated chocolate pieces
- Sweetened flaked coconut
- Miniature marshmallows
- Decorator sugars
Method
- Combine 1 cup butter and sugar in bowl; beat at medium speed until creamy. Add egg, milk and almond extract; continue beating until well mixed. Add flour and baking powder. Beat at low speed until well mixed.
- Divide dough in half. Shape each half into ball; flatten slightly. Wrap each in plastic food wrap; refrigerate at least 2-3 hours until firm.
- Heat oven to 400°F.
- Roll out dough on lightly floured surface, one-half at a time (keeping remaining dough refrigerated), to 1/8- to 1/4-inch thickness. Cut with 3-inch round cookie cutter. Place 1 inch apart onto ungreased cookie sheets.
- Bake 6-8 minutes or until edges are lightly browned. Cool 1 minute on cookie sheets; remove to cooling rack. Cool completely.
- Combine powdered sugar, 2/3 cup butter, vanilla and enough whipping cream for desired frosting consistency in bowl. Beat at medium speed until well mixed. Reserve a portion of white frosting. Tint remaining portions of frosting with desired food colors. Spread or pipe frosting as desired.
Source: Land O Lakes
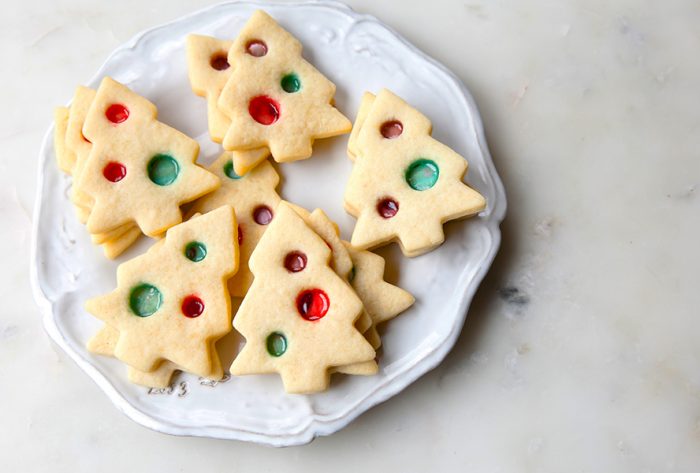
Stained Glass Cookies
Ingredients
Cookie
- 1 cup butter, softened
- 1 cup sugar
- 1 large egg
- 2 tablespoons milk
- 1 12 teaspoons almond extract
- 2 12 cups all-purpose flour
- 1 teaspoon baking powder
Method
- Prepare the cookie dough as directed. Divide the dough in half, shape into disks, and cover in plastic wrap. Chill the dough in the refrigerator for at least 30 minutes.
- When ready, roll out one half of the cookie dough at a time to about ¼-inch thick on a lightly flour-dusted work surface. Using a decorative cookie cutter, cut out shapes of dough.
- Transfer the cookies to a parchment-lined baking pan, spaced about an inch apart. Use a smaller cutter or the end of a round piping tip to punch out holes. Chill the cookies (on the baking pan) for at least 30 minutes.
- Stack the cookie dough scraps and cut-outs and re-roll. Repeat with the remaining dough. Meanwhile, preheat the oven to 375F.
- Grind the hard candies into a powder using a food processor, one color at a time. The powder will begin to clump and harden if left out, so use immediately.
- Using a small spoon, carefully fill the holes of the cookies with different colors of ground candy. Fill the holes completely. Try to prevent the candy from spilling onto the surface of the cookie. Brush away any excess candy.
- Bake the cookies in the preheated oven for 9 to 12 minutes. If at 9 minutes the candy-filled holes seem thin, very carefully spoon in a little bit more candy and continue to bake just until melted.
- When done, place the baking sheet on a wire rack. Allow cookies to completely cool before carefully removing the cookies with a metal or rubber spatula. The melted candy will be very hot. Please take caution and do not touch until cookies have cooled.
- Store cooled cookies in an air-tight container.
Source: Food Network
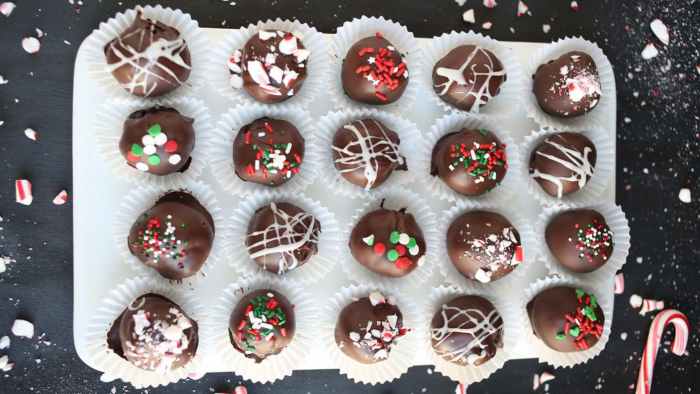
Christmas Truffles
Ingredients
- 1 package Oreos (14.3 oz or 45 cookies)
- 1 cup (8 oz or 226 g) cream cheese, room temperature
- 2 1/2 cups (437 g) semisweet chocolate (or white chocolate)
- Sprinkles for decorating
Method
-
Place the Oreos in a food processor and pulse until fine crumbs form. Add the cream cheese and pulse until smooth. Transfer mixture to a bowl and cover it. Place in the fridge for about 45 minutes.
-
Line a baking sheet with parchment paper (or wax paper). Take the truffle mixture out of the fridge. Use a 1-inch cookie scoop to scoop mixture and roll into 1-inch balls. Place balls on prepared baking sheet and transfer to the freezer for an hour.
-
Melt the chocolate chips in a makeshift double boiler (see notes for microwave instructions). Place chocolate chips in a heat-safe glass bowl over a pot of simmering water. Gently stir until chocolate is completely melted.
-
Remove truffles from freezer. Using dipping tools or two forks to dip a truffle in the melted chocolate and coat evenly. Gently tap off the excess chocolate on the side of the bowl and return truffle to the tray. Immediately add sprinkles if desired as the chocolate will harden quickly. Repeat with remaining truffles.
-
Store the truffles in an airtight container in the fridge for up to three weeks.
Source: If You Give a Blonde a Kitchen
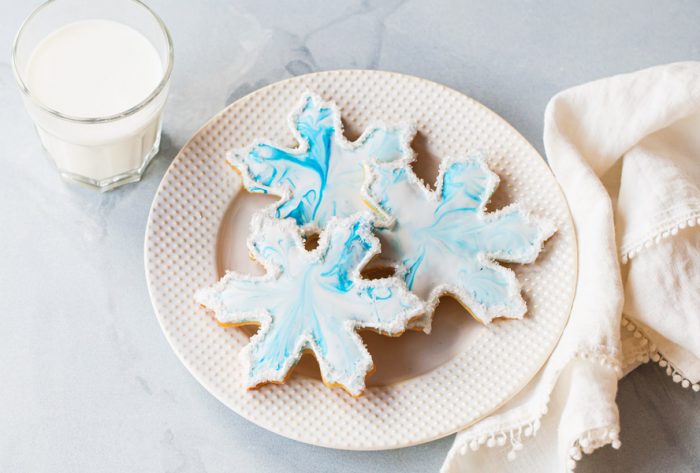
Watercolour Snowflake
Ingredients
- 1 recipe sugar cookies – cut and baked into snowflakes 4 cups confectioners’ sugar
- 3 Tbsp meringue powder
- 6 Tbsp water, plus more to thin
- 1 Tbsp light corn syrup
- ½ tsp vanilla extract or lemon juice (optional)
- gel food coloring
- sanding sugar, sprinkles, or sugar pearls (optional)
Method
Icing
- Place the confectioners’ sugar and meringue powder in the bowl of an electric mixer fitted with a whisk attachment. Gently stir to combine. Add the water and mix on medium-low until combined. Turn the mixer up to medium-high and continue to mix until stiff peaks form 7 to 10 minutes.
- Add the corn syrup and vanilla or lemon (if using) and mix to combine. If the icing is still rather thick and clumps together, add more water (a teaspoon or two at a time), until the icing holds stiff peaks. Use immediately, or cover by pressing a piece of plastic wrap directly to the surface of the icing.
Decorating
- Split the icing in half. Place half in a mixing bowl and cover the remaining icing tightly with plastic wrap. Set aside.
- Thin the icing in the mixing bowl with water, a tablespoon or two at a time. Mix the icing and water together until smooth and the icing becomes a consistency that is slightly thicker than honey. It should be fairly thin, but still thick enough to cling to the cookies. More water may be added as needed if the icing does not settle smoothly on the cookies.
- Dip a toothpick (or the tip of a knife) into the gel food coloring, then swirl the color on top of the thinned icing. You may mix multiple colors together if desired.
- Dip the entire top of a snowflake cookie into the surface of the icing. Give the cookie a small twist, then lift. Gently shake the cookie to allow some of the excess icing to fall back into the bowl. Turn the cookie right-side-up and place it on a piece of parchment paper or wire cooling rack. Gently tap the bottom of the cookie to release any air bubbles and/or to help the icing settle. Allow the icing to completely dry, at least 4 hours.
- Continue with the remaining cookies, adding more swirls of food coloring as needed. The more you dip and swirl, the more the colors will blend together.
- To add the sprinkle border, thin reserved icing with water until it is the consistency of toothpaste. Place sanding sugar or sprinkles in a shallow bowl. Fill a piping bag (or a zip-top bag with the corner snipped off) with the icing and pipe around the edges of the dried watercolor cookies. Flip and dip the cookie upside down into the bowl of sprinkles. Gently press so that the sprinkles stick to the icing. Allow the cookies to dry right-side-up. Note that it is important for the watercolor icing to be completely dried first, or the sprinkles will stick to the surface of the cookie.
- Once dried, store in an airtight container at room temperature for up to a week or so.
Source: Food Network
Peanut Butter Ritz Cracker Cookies

Ingredients
There really are no set measurements for these cookies, so feel free to adjust this recipe as needed.
- 12 ounces melting candy (white, colored, or chocolate)
- 24 Ritz crackers
- 3/4 cup creamy peanut butter
- sprinkles and candies to decorate
Method
- Melt the melting candy according to package directions.
- Pipe peanut butter in between Ritz crackers to make cracker sandwiches.
- Dip the cracker sandwiches in the melted chocolate. Use a fork to remove and tap edge of bowl to allow excess chocolate to drip off.
- Place on silicone baking mat or parchment paper to cool and harden. Decorate with sprinkles and candy before chocolate has hardened.
Source: Something Swanky
Check out also:
- Christmas🎄Gifts Ideas For Everyone
- Thanksgiving Activities for Family – Virtual Friendly
- Baby Naming: How to Choose a Perfect Name for Your Baby
- Thanksgiving Easy Recipes Kids Can Make
- Motion Detection on Annie Baby Monitor App
- 60+ Homemade baby food combinations
![]()
![]()
![]()
![]()
